Documentation
Getting started
Reports
Report templates
Administration
Step 3 – Let's add data
Let's use the project name of the project that the JIRA user selects to change the title of the status report. It will also be handy to include the date of report generation. Let's quickly setup Intelligent Reports to fill in this information for us.
-
In your Microsoft Word document change your main heading to something like Project Name Status Report.
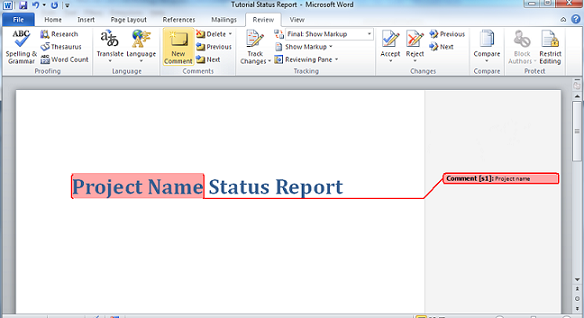
Select the words Project Name. Click the New Comment button in the Review tab. Let's call this comment Project name.
-
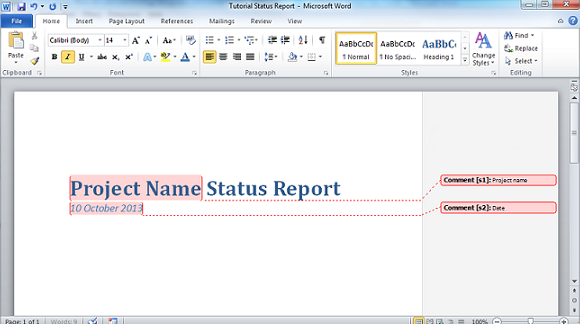
Intelligent Reports uses Microsoft Word comments to locate sections of the template you wish to modify. The name of the comment does not matter, but it's better to choose something obvious.
We also want to replace the date, so type a date below the title, select it and create a comment on it, we will call the comment date.
-
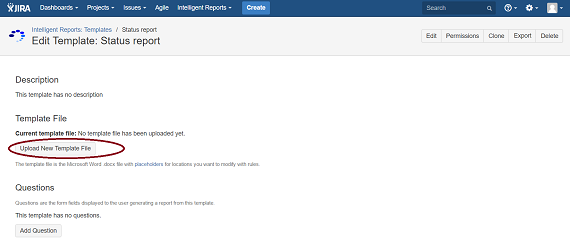
Save the document and re-upload it to Intelligent Reports by clicking the Upload new template file button on the template page.
-
Now we need to create a rule to replace our commented sections with appropriate content. Click the Add Rule button on the Edit Template page to add a rule.
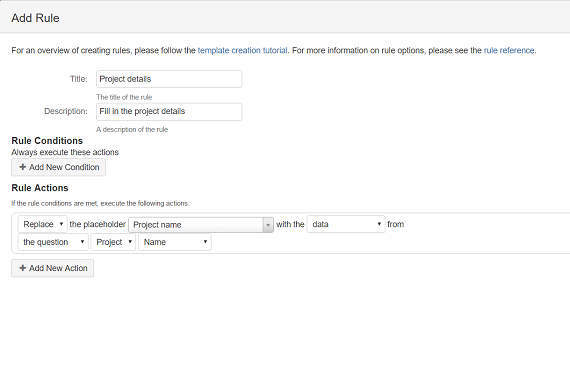
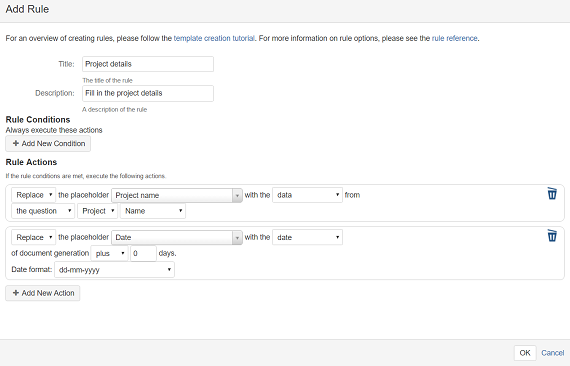
Give your rule a title, say Project details, and a description if you wish. We want this rule to always be executed so you can ignore the rule conditions section.
Let's replace the Project name comment with the actual name of the JIRA project.
Add an action using the Add New Action button. Select Replace because we are replacing the project comment with JIRA data. Start typing the name you gave the comment your Microsoft Word file in the placeholder box. An autocomplete list will pop up to save you typing, we want to replace the comment project name so select it. Now choose data followed by question from the list of possible replacement choices. Choose the project question, and choose the name field of the project. When you are done your rule action should look like this:
-
Click the Add New Action button to add another rule action to replace the date. Choose Replace. Enter the name you gave the date placeholder comment in the placeholder box. Now choose date as the replacement type to insert the date of document generation into your report.
Click OK and you are done.
Create a copy of this report from the Generate Report page and you will see that the project name and the date have been filled in.
Next: Step 4 - Tables of issues
Previous: Step 2 - Pick a project, any project
Want to skip ahead or read it again?