Documentation
Getting started
Reports
Report templates
Administration
Scheduled reports
Intelligent Reports allow you to have reports automatically generated and emailed to you. This feature is useful if require regular reports such as weekly progress reports. Scheduled reports are generated automatically at the next scheduled date, and emailed to you using JIRA email.
Note that you must have JIRA email sending correctly configured to use the scheduled reports feature.
Setting up a scheduled report
You can follow these steps to set up a scheduled report.
-
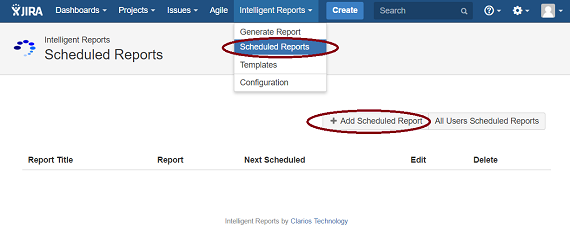
Navigate to the Intelligent Reports Scheduled Reports page from the top JIRA menu.
-
Click the Add Scheduled Report button.

-
You should be able to see the Create Scheduled Report dialog box. You should be able to see the following fields.
-
Report title
What you enter here will be used as the Subject line when the report is emailed to you.
-
Report
Choose the report that you want emailed to you.
-
Next report date
The date this report will be first generated and emailed to you on as part of this scheduled report.
-
Repeat
The interval at which the report will be generated. For example if you would like the report generated weekly put 7, then every seven days from the Next report date Intelligent Reports will generate the report and email it to you and any other recipients you have selected.
-
Email to
Add other recipients for your report. If you wish for this report to be emailed to yourself only, you can leave this field blank.
The report will be generated using your JIRA permissions and every recipient will receive the same report. Be careful if other users should not see data you have permissions for.
-
-
Once you have finished, click the Save button to save your scheduled report. You should be able to see it in the list of scheduled reports.
Making changes to scheduled reports
You can follow these steps to make changes to an existing scheduled report.
-
Navigate to the Intelligent Reports Scheduled Reports page from the top JIRA menu.
-
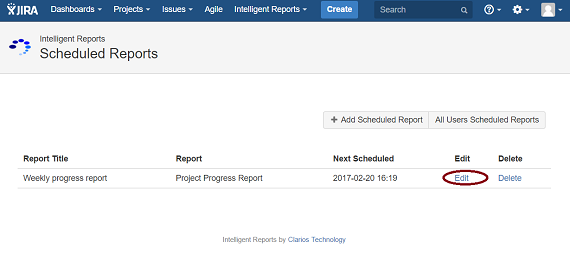
Click the Edit link next to the report you want to edit.

-
You should be able to see the Edit Scheduled Report dialog box. Make your changes. Once you have finished, click the Save button to save your changes to your scheduled report.
Cancelling a scheduled report
You can follow these steps to cancel an existing scheduled report.
-
Navigate to the Intelligent Reports Scheduled Reports page from the top JIRA menu.
-
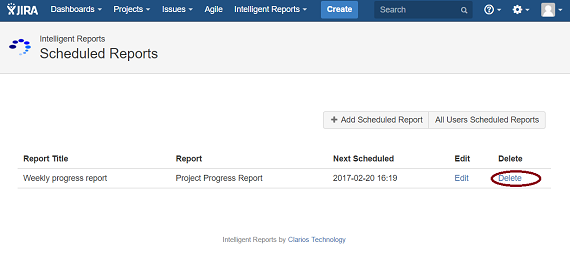
Click the Delete link next to the report you want to delete.

-
A pop up window will ask you to confirm your choice. Click OK to cancel the scheduled report. Note that cancelling a scheduled report does not delete the report template.